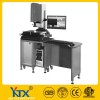
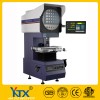
Image measuring instrument - the second element - Optical measuring instrument
Function:
The image Precise mapping instrument integrated combination of optical, mechanical, electrical intake of the workpiece computer processing and 20-120 times zoom, photo archive or superficial observation, measurement, drawing on the screen, you can direct measurement data do SPC statistics, made EXCEL statements, draw the drawing can turn into AUTOCAD application, AUTOCAD graphics can also be transferred to the computer software in contrast with the workpiece made of the information can be stored on a computer, print, and more can be sent over the network.
Scope:
Machinery, electronics, aerospace, mold, springs, gears, wiring terminal board contacts, metal plastic, magnetic materials, electronic circuits, components, watches, hardware stamping industry, ore industry, and other precision hardware industry.
Key Features:
• Fully machine structure is stable and not easily deformed, high-precision workpiece products suitable for non-contact precision measurement.
With the Y axis, the X axis of the machine measurement station using ultra-high precision linear guide, high precision and durable with a long time to keep the machine. In addition, this machine also apply to the general measurement environment with the laboratory environment.
• measuring the height between the X-axis and Y-axis, market models, design the best and thinnest models.
• Technology Z-axis arch support design allows the rail with optical lens to achieve the best close-design completely symmetrical and balanced mechanics, and reduce errors.
• triaxial XCM patented high-precision optical read head measurement system
• light source using a high-tech optical LEDs color cold light, not heat, low electricity consumption and a life span of more than 50,000 hours of work.
• the design of the laser spot, convenient to the operator to confirm the location of the measurement.
• measurement contour with green LEDs light at the end of the optical fiber cold light brightness.
• Measuring the surface with white LEDs light source is composed of the ring-type light source of the LED lamp, the brightness can also be used when the stylized editing measurement. Can also be another optional programmable control of the four-way polarized surface light source, or coaxial light source.
Technical Data Features:
The image measurement horizons can use the mouse to do the measuring operation, and can automatically filter unwanted access point. Split or segmented amount determined elements available to larger filter, and can automatically filter unwanted access point.
Software and can control the light source and can be used with automatic boundary.
The screen calibration sheet has a number of correction function, the provision of fast surface and the outline of the image can be measured Measure with. Advanced Z-axis focus function, the use of a continuous curve of the small window to improve focus accuracy
• precision Japan SONY chip camera.
The • machine Magnification 0.7X ~ 4.5X
• optical read head minimum resolution: 0.1 μ m
• Linear accuracy: (3 + L/75) um
• workpiece maximum load: 80kg
Software Description:
1, spc Data conversion (process capability analysis): measurement information can be exported to Excel for analysis
2, the graphics can be entered into AutoCAD drawing
AutoCAD standard drawing input in real-time video, make AutoCAD drawings with the actual shape of the workpiece overlap compared to find out the difference between the workpiece and drawing
4, enter the previous camera jpeg images stored to the real-time image overlap contrast with the actual workpiece
5, bird's eye view of the whole figure dimensioning
Custom round: according to the customers need to set our own standards circle, then standard round and image artifacts do overlap compared to find the error between the workpiece and the standard round
7, custom segment: can define their own line segment coordinates of the starting point, length, angle of rotation, with the image of the workpiece overlap contrast, to find an error between the workpiece and the standard graphics
8, own the customer coordinates: set in real-time image of the actual workpiece coordinate origin (0,0), at any point on the screen marked the point X, Y coordinates location
Coordinates marked: to own the coordinates of the origin (0,0), marked the coordinates of the location of any point on the screen
10 Patent take the R angle: for accurate plane currently on the market to take R angle
11, Measurement: measurable on the plane of any geometry (angle, diameter, radius, the distance of the point to the line, the eccentricity of the two circles, two points spacing, etc.)
12, drawing: the real-time image of the actual workpiece shape is drawn to form a complete drawing, drawing way and AutoCAD similar
13, marked: real-time images of the workpiece dimension. (Length, angle, diameter, radius, distance from the point to the line, the eccentricity of the two circles, two points spacing
14, automatically take the line, take a circle: without manual line or circle can automatically use the software within a certain range to capture the most accurate line and circle
MODEL VMS-1510 VMS-2010 VMS-3020 VMS-4030 VMS-5030
(X / Y / Z axis) measured stroke (mm) 150 * 100 * 100 200 * 100 * 175 300 * 200 * 175 400 * 300 * 175 500 * 300 * 175
Dimensions 540x560x850 540x560x850 760x600x900 970x670x940 970x770x940
The base of the machine precision granite base and column
Surface light source of lighting systems and transmission light source with LED adjustable brightness
CCD high-resolution color Sony CCD Japan
X, Y-axis measurement accuracy (3 + L/150) um
Magnification Step Zoom optical magnification :0.7 - 4 .5 X, the image magnification :28 - 180X
The optical ruler Resolution 1 um
Repeatability 2 um
Operation Manual
Power supply 220V 50HZ
Appropriate temperature, humidity, temperature: 19 ° - 24 °, Humidity: 45% - 75%
Warranty period of one year
Image measuring instrument - the second element - optical measuring instrument Coors] provide professional! Service Hotline -6789-291


